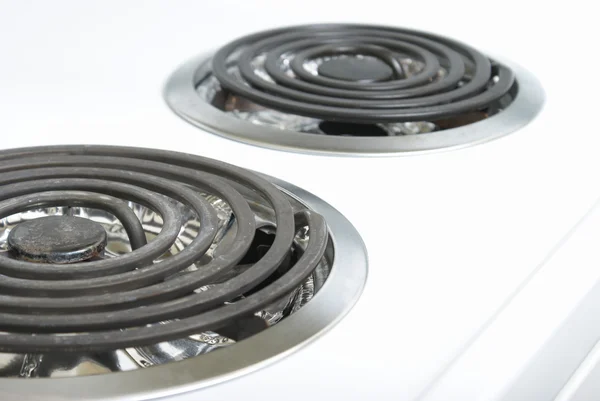
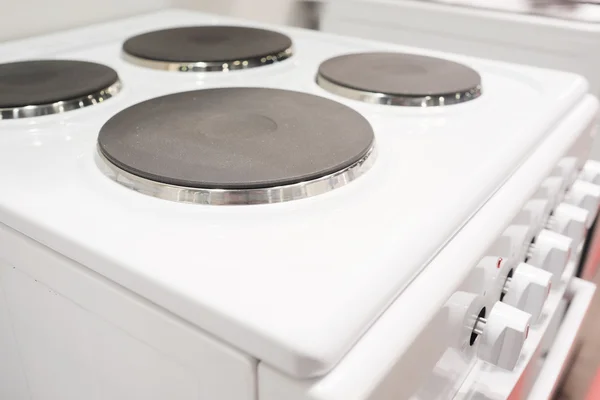
Keeping your coil stove top clean is crucial not only for aesthetics but also for its performance and longevity. Regular cleaning of coil stove tops helps maintain their efficiency, prevents food buildup, and reduces the risk of fire hazards. With a step-by-step guide, you can effectively clean your coil stove top and ensure its optimal functioning.
By following these guidelines and incorporating them into your cleaning routine, you can keep your coil stove top in optimal condition, ensuring both its longevity and performance.
Why is it Important to Clean Coil Stove Tops Regularly?
Regularly cleaning coil stove tops is important for several reasons. It is important to clean coil stove tops regularly for a variety of reasons. A clean stove top ensures efficient heat distribution, which leads to faster and more even cooking. This is why it is important to clean coil stove tops regularly. It also prevents the buildup of food residue and grease that can attract pests and cause unpleasant odors.
Regular cleaning is important for preventing the accumulation of food residue and grease which may attract pests and result in unpleasant odors. Additionally, regular cleaning extends the lifespan of the stove top and reduces the risk of damage or malfunction. That’s why it is important to clean coil stove tops regularly.
How to Clean Coil Stove Tops
Looking to keep your coil stove top in pristine condition? Look no further! In this step-by-step guide, I’ll walk you through the entire process of cleaning coil stove tops. From preparing the necessary supplies to the final reassembly and reconnection, each sub-section will cover all the essential steps you need to follow. Get ready to make your coil stove top sparkle and shine like new again!
Prepare the necessary supplies
- Prepare the necessary supplies
- Gather cleaning supplies such as dish soap, warm water, microfiber cloth, scrub brush, and gloves.
- Make sure you have vinegar or baking soda for tougher stains.
- Prepare a bucket or sink with warm soapy water for soaking removable parts.
- Keep a trash bag nearby for easy disposal of debris.
Disconnect the power and remove the coils
- Disconnect the power and remove the coils.
- Gently lift and remove the coils from the stove top.
- Inspect the coils for any signs of damage or wear.
Clean the coils
- Mix a solution of warm water and mild detergent.
- Dip a cloth or sponge into the solution and wring out excess moisture.
- Gently scrub the coils with the damp cloth or sponge.
- Rinse the coils thoroughly with clean water.
- Allow the coils to dry completely before reattaching them to the stove top.
Clean the drip pans
- Remove drip pans from the stove.
- Soak the drip pans in warm, soapy water.
- Scrub the pans with a sponge or brush to remove any food or debris.
- Rinse the pans thoroughly with water.
- Dry the pans completely before replacing them on the stove.
To keep your drip pans clean and in good condition, it is recommended to clean them regularly after cooking and remove any spills or food particles. This will prevent built-up residue and make cleaning easier in the future.
Reassemble and reconnect
- Reattach the coils to their designated spots on the stove top.
- Ensure that the coils are securely placed and properly aligned.
- Reconnect the power by plugging in the stove or flipping the circuit breaker.
- Double-check that all connections are secure and the stove is functioning correctly.
- Test the stove by turning it on and ensuring that each coil heats up properly.
- Reassemble and reconnect
Tips and Tricks for Effective Cleaning
Looking to keep your coil stove top sparkling clean? Dive into these easy and effective cleaning tips and tricks. From regular maintenance to avoiding harsh chemicals, we’ll cover it all. Plus, discover the magic of vinegar or baking soda for tackling those stubborn stains. Say goodbye to greasy build-up and hello to a pristine cooking surface in no time!
Avoid harsh chemicals and abrasive materials
- Avoid harsh chemicals that can corrode the coil and surrounding areas.
- Use non-abrasive materials like soft cloths or sponges to prevent scratching the surface.
- Vinegar and baking soda can effectively remove stubborn stains without causing harm.
Use vinegar or baking soda for stubborn stains
- Mix equal parts vinegar and water in a spray bottle.
- Spray the mixture onto the stubborn stains.
- Let it sit for a few minutes to loosen the stains.
- Scrub the stains gently with a soft brush or sponge.
- If the stains persist, use vinegar or baking soda to make a paste with water.
- Apply the vinegar or baking soda paste to the stains and let it sit for a few minutes.
- Gently scrub the stains again with the brush or sponge.
- Rinse the area thoroughly with water.
Don’t forget to rinse off all the vinegar or baking soda residue to avoid any lingering smells. For extra stubborn stains, you can repeat the process or try using a specialized stove top cleaner.

Preventing Future Build-up on Coil Stove Tops
- Prevent future build-up on coil stove tops by cleaning spills immediately to prevent them from hardening and becoming difficult to remove later.
- Use drip pans or burner covers to catch any spills or food debris, making it easier to clean and preventing future build-up on coil stove tops.
- Regularly wipe down the surface of the stove top with a damp cloth or sponge to remove any grease or residue and prevent future build-up on coil stove tops.
- Avoid using abrasive cleaners or scrub brushes that can scratch the surface and make it more prone to future build-up on coil stove tops.
- Consider using liners or mats that can be easily removed and cleaned to protect the coil elements from spills and make clean-up easier, preventing future build-up on coil stove tops.
- Periodically lift and clean the coil elements to remove any built-up grease or food particles, preventing future build-up on coil stove tops.
Our team in Ivy Cleans will help you with your cleaning issues at home. Book us a call and let our representative book the appointment for you.
