
Cleaning cabinets before painting is an essential step in achieving a professional and long-lasting finish. Properly cleaning the cabinets ensures that the paint adheres properly, removes dirt and grease build-up, and creates a smooth surface for the paint application.
Cleaning Ensures Proper Adhesion
Cleaning cabinets helps to remove any dirt, dust, or debris that may have accumulated over time. This is important as it ensures a clean surface for the paint to adhere to.
It eliminates grease and oils. Grease and oils can build up on cabinet surfaces, especially in the kitchen. Cleaning the cabinets helps to remove these substances, which can interfere with paint adhesion.
Cleaning the cabinets also ensures that the surface is smooth and free from imperfections. Any bumps or roughness on the surface can prevent the paint from adhering properly. When cabinets are properly cleaned before painting, the paint has a better chance of lasting longer. Proper adhesion helps to prevent peeling, chipping, or flaking of the paint over time.
Clean cabinets provide a fresh canvas for painting, allowing the paint color to appear more vibrant and even. Proper adhesion ensures a consistent and professional-looking finish.It is essential to thoroughly clean cabinets before painting to ensure proper adhesion of the paint and achieve the desired results.
Removes Dirt and Grease Build-up
Removing dirt and grease build-up is crucial to prepare cabinets for painting and ensure proper adhesion of the pain, and achieve a smooth and uniform finish. Dirt and grease can accumulate on cabinets over time, making it challenging for paint to adhere adequately.
How to Clean Cabinets before Painting
Discover the secrets to prepping your cabinets for a flawless paint job, so you can achieve professional-looking results right at home. Let’s dive in and get those cabinets primed for a stunning makeover!
Remove Cabinet Hardware
- Initiate the process by unscrewing and detaching the knobs, handles, and any other hardware connected to the cabinet doors and drawers.
- Securely place all the hardware in a small container or bag to maintain organization and prevent misplacement.
- Depending on the type of screws utilized, employ either a screwdriver or drill to meticulously remove the hardware from the cabinets.
- Exert caution to avoid stripping the screws or causing any damage to the cabinet surface while eliminating the hardware.
- If the cabinets possess any hooks, brackets, or other accessories, it is essential to remove them as well.
By properly removing the cabinet hardware, you will acquire a pristine and smooth surface to work on when applying paint. This procedure also grants you the option to either paint the hardware separately or replace it altogether, according to your preference.
Empty the Cabinets
Remove all items from the cabinets, including dishes, cookware, and any other stored items. This will ensure that you have easy access to all surfaces and prevent any items from getting in the way during the cleaning process. Additionally, make sure to empty the cabinets completely.
Clean the cabinets with a mixture of warm water and mild soap. Dip a sponge or cloth in the soapy water and gently scrub all surfaces of the cabinets, including the doors, shelves, and interior. Pay extra attention to areas that may have accumulated grease or stains. Remember to empty the cabinets before starting the cleaning process.
Dust the Cabinets
Dust and dirt can interfere with the paint’s adhesion, leading to uneven coverage and potential peeling or chipping in the future. By thoroughly dusting the cabinets, you create an optimal base for the paint to adhere to, resulting in a more durable and professional-looking finish.
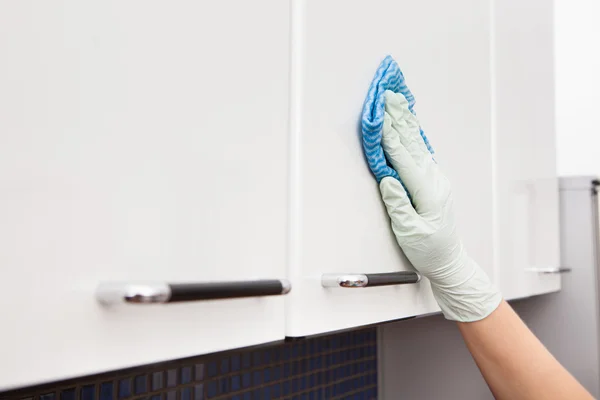
Clean with Soap and Water
To enhance the cleanliness of your cabinets before painting, consider applying a degreaser or vinegar solution to tackle any remaining grease or grime. Remember, cleaning your cabinets with soap and water not only eliminates dirt and grease buildup but also primes the surface for improved paint adhesion, resulting in a polished and long-lasting finish.
Remove Grease and Stubborn Stains
- Dampen a sponge or cloth: Dip a sponge or cloth into the cleaning solution and wring out any excess liquid.
- Gently scrub the stains: Begin by scrubbing the areas with grease or stubborn stains using the damp sponge or cloth. Apply pressure, but be careful not to damage the cabinet surface.
- Focus on problem areas: Pay extra attention to areas where grease buildup is evident, such as near the stove or handles. Use circular motions to lift the grease from the surface.
- Repeat if necessary: For particularly stubborn stains, you may need to repeat the cleaning process multiple times until the grease is fully removed.
- Rinse with clean water: After removing the stains, rinse the cabinets with clean water to remove any soap residue. Ensure all the soap is thoroughly washed away.
- Dry the cabinets: Use a clean cloth or towel to dry the cabinets completely. This step is important to prevent any moisture from affecting the adhesion of the paint.
Rinse and Dry
- After cleaning the cabinets with soap and water and removing grease and stubborn stains, it’s essential to thoroughly rinse them with clean water.
- Use a clean cloth or sponge to wipe away any remaining soap residue.
- Make sure to completely dry the cabinets using a dry cloth or towel to prevent any moisture from lingering on the surface.
- If necessary, open windows or use a fan to help the cabinets air-dry more quickly.
Additional Tips for Cleaning Cabinets
- Avoid harsh chemicals that can damage the cabinet’s finish. Instead, choose mild soap and water or a vinegar and water mixture.
- Begin by emptying the cabinet and cleaning the interior shelves and surfaces first. Remove any dust or debris.
- Don’t forget to clean the cabinet hardware, such as knobs and handles. Use a cloth or sponge dampened with the cleaning solution to remove dirt and grime.
- For hard-to-reach areas like corners and crevices, use a soft-bristled brush or an old toothbrush. Make Dry thoroughly: After cleaning, ensure the cabinets are completely dry to prevent water damage. Use a clean, dry cloth or towel to remove any excess moisture.
Feel free to reach out to us today and discover why Ivy Cleans is your top choice for cleaning services in Minneapolis, Minnesota. We’re here to ensure your spaces are impeccably clean and well-maintained.
