
Cleaning bathroom grout is an essential task in maintaining a clean and hygienic bathroom environment. Over time, grout can accumulate dirt, stains, and even mold or mildew, which not only make your bathroom look unsightly but can also pose health risks.
Steps in Cleaning Bathroom Grout
Want to know the secret to sparkling clean bathroom grout? Look no further! In our step-by-step guide, we’ll walk you through the process of getting your bathroom grout back to its former glory.
Prepare the Necessary Supplies
- A bucket to hold water and cleaning solutions for the cleaning process.
- Hot water to help dissolve grime and stains more effectively.
- Vinegar to effectively break down stains and disinfect the area.
- Baking soda as a gentle abrasive that can remove tough stains and brighten grout surfaces.
- An old toothbrush or scrub brush for scrubbing the grout lines and removing dirt and stains effectively.
- A grout brush to penetrate deep into the grout lines for a thorough clean.
- A sponge or cloth to wipe away excess cleaning solution and rinse the grout.
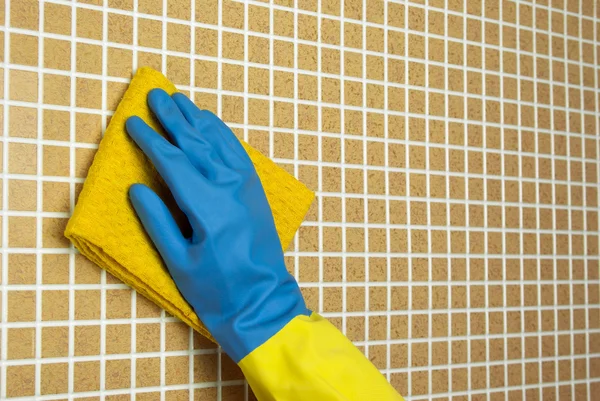
- Protective gloves for handling cleaning solutions to ensure the safety of your hands.
- Old towels or paper towels to dry the grout and prevent moisture from seeping back into the grout lines.

Pre-Treat the Grout
- To pre-treat the grout and ensure better results, start by mixing equal parts of baking soda and water to form a paste. For example, you can mix 1/4 cup of baking soda with 1/4 cup of water.
- Apply the baking soda paste directly onto the grout lines using a small brush or an old toothbrush.
- Gently scrub the paste into the grout, making sure to cover all the stained areas.
- Let the paste sit on the grout for about 15-20 minutes to allow it to penetrate and loosen the dirt and stains.
- After pre-treating the grout, rinse the grout lines with clean water to remove the baking soda paste.
Scrub the Grout Lines
- Apply a small amount of your chosen cleaning solution to the brush.
- Scrub the grout lines using the brush in a back-and-forth motion.
- Apply more pressure to any stubborn stains or heavily soiled areas while scrubbing.
- Continue scrubbing until the grout lines are clean and stains are removed.
- Repeat the scrubbing process if necessary to remove any remaining stains.
- Once the grout lines are clean, rinse them thoroughly with water to remove any residue from the cleaning solution.
- Dry the grout lines with a clean towel or allow them to air dry completely.
Rinse the Grout
- Dip a sponge or cloth into the water, making sure to wring out any excess liquid.
- Thoroughly wipe the grout lines with the dampened sponge or cloth, ensuring complete coverage.
- Regularly rinse the sponge or cloth in the bucket to eliminate dirt and residue.
- Continue the rinsing process until the water runs clear, ensuring there is no visible soap or cleaner residue remaining.
- Once the grout is rinsed, use a clean, dry cloth or towel to dry the grout lines.
Dry and Seal the Grout
- Thoroughly clean the grout lines to eliminate any dirt, grime, or mildew.
- Allow the grout to dry completely before proceeding to the next step.
- Evenly apply a grout sealer on the grout lines using a small brush or sponge.
- Let the sealer sit for the recommended amount of time indicated on the product packaging.
- Using a clean, damp cloth, wipe off any excess sealer from the tiles.
Drying and sealing the grout is essential as it protects it from stains, water damage, and the growth of mold and mildew. The sealer creates a protective barrier that prevents liquids and dirt from penetrating the grout, making it easier to clean and maintain in the future.
Tips for Cleaning Bathroom Grout Effectively
- Start by spraying a mixture of equal parts water and vinegar onto the grout.
- Utilize a stiff-bristled brush to scrub the grout, applying firm pressure.
- For those more stubborn stains, create a paste by combining baking soda and water. Apply the paste onto the grout and allow it to sit for 10 minutes before beginning the scrubbing process.
- Rinse the grout with water and then wipe it down using a clean cloth or sponge.
- If there are particularly challenging stains, you can try using hydrogen peroxide. Simply apply it directly to the grout, let it sit for 15 minutes, and then proceed with scrubbing and rinsing.
Preventing Grout Stains and Mildew in the Future
- Clean regularly: To avoid dirt and stains from settling, make sure to clean the grout on a regular basis. Use a gentle cleaning solution and a brush to scrub the grout lines.
- Squeegee after showering: After taking a shower, use a squeegee to remove excess water from the tiles and grout. This simple step will prevent moisture build-up and reduce the chances of mildew growth.
- Apply grout sealant: Applying a grout sealant to the grout lines will create a protective barrier against stains and moisture. Remember to reapply the sealant every year or as recommended by the manufacturer.
- Avoid harsh cleaning products: Harsh chemicals can harm the grout and make it more vulnerable to stains and mildew. Opt for mild, non-abrasive cleaners specifically formulated for grout.
Clean and well-maintained grout not only adds to the aesthetics but also contributes to a healthier and more hygienic space.Our experienced team in Ivy Cleans specializes in revitalizing bathroom grout, restoring it to its original glory. Let us take care of the grout cleaning, so you can enjoy a sparkling clean bathroom without the hassle.
